June 27, 2012

Little Golden Books Baby Shower in Yellow and Blue


Inspired by this Little Golden Books theme baby shower extravaganza, my sister, mom, and I decided to put together a Golden Books baby shower for Jen back in January.  (Yes, this post is kind of late, but better late than never.  And if you have a little time, I strongly recommend you check out more of the theme parties posted on Aesthetic Nest -- that woman is amazing.)


Instead of sticking strictly to Little Golden Books, we relaxed the idea a bit and included a variety of vintage books and toys. A lot of the Golden Books were found at local used bookstores, but the toys and some other well-loved books were rescued from the depths of my parents' basement and given a day out on display, to be admired (and even played with when my friend stopped by with her two little boys!).

This doll belongs to my mom.
I love the expression on this little lamb figurine.
My mom was quick to point out that the little guy
with glasses is Mr. Hooper from Sesame Street.
Anyone need to make a call?

This metal spinning top has seen a lot of action through the years.

More little vintage toys.
From Aesthetic Nest, I downloaded some theme-specific printables, including bookplates, cupcake wrappers, and a print reminiscent of the Little Golden Books paper to use in the invitations.


Guests were invited to fill out bookplates for Hannah's library.
Sweet potato cupcakes with brown sugar cinnamon
icing got dressed up to match the theme.
I printed the invitation text on velum sheets and used a
small decorative brad to connect it to the print paper.

The table featuring the invitation and a photo of Hannah also included a diaper cake made by my mom and friends.  Instead of rolling up each individual diaper, they spiralled the diapers around the center of each layer.  The "cake" topper was a little Stieff duckling.  For this adoption baby shower, we also displayed additional pictures of Hannah with her parents for the guests to enjoy.


We had so many books that we had to get creative with our displays.  From the food table to the staircase, there were books everywhere.


Finally, as we decorated the house the night before the party, we decided that we needed just one more thing -- a banner strung across the doors to greet guests as they entered and to remind us all of the little one we'd gathered to celebrate.  Mom, Emily, and I scrounged up some extra wrapping paper from the gifts and Emily sketched the letters that we glued onto pennants and strung up with a length of blue yarn.

(My dad will be happy to see that his mounted deer
and pheasant made it onto the blog.  Sheesh.)

This baby shower was a lot of fun to put together, and the Little Golden Books and vintage toys themes gave us a lot of room to play around.  I think this shower shows that you don't have to follow something you find online down to the last detail -- pick and choose the elements you like and the elements you can execute, and then get creative and come up with some ideas to personalize the design.  In the end, a baby shower or any party is about the guest or guests of honor -- the rest is just window-dressing!

Emily, me, Mom, and Jen, with our post-shower glow.

Note: The beautiful photos in this post were all taken by our friend Mary.  Thank you, Mary, for documenting the party for us!


June 26, 2012

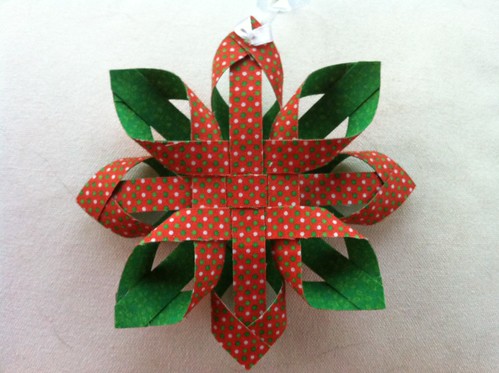
June Ornament: Finnish Star

Finnish Fabric Star 

Elizabeth threw out the ornament challenge for June, and I have answered in the month of June, which is kind of a miracle. All it took was a simple Google search to stumble upon this Finnish Star at A Cherry On Top.

While the site provides instructions for a paper version, I switched mine up and made it using fabric. All it took was a little prep work, which included using fusible interfacing (heat-n-bond) to fuse two fat quarters together. By using the fat quarters, I was able to keep this project under $10. After ironing the wrong sides of the fabric together, all you have to do is cut and glue according to the directions and you can literally have a star in your hands in under 15 minutes. By using the fat quarters, I have enough fabric left to make four or five more stars, so watch out relatives! There may be a fabric star tied to the top of your Christmas presents this year.

June 23, 2012

Yummmm.... Nutella 3 Ways


While my sister was visiting, I decided to try a recipe off our Inspire Me Grey "Food I Should Make" Pinterest board. Yes, shocking I know -- to actually set out and accomplish something "pinned" is amazing indeed! The recipe was a hit (not too sweet) and I highly recommend it with a nice cup of tea. However, it did leave me with a dilemma: What do you do with the rest of the Nutella? I've come up with three great ways to use up a jar of Nutella so that you don't fall victim to it's delicious goodness that calls to you in the middle of the night.

1. Nutella Crescent Pockets

Found on Pinterest (no link available) so I'll attribute to the pinner Kitschy Cupcakes, whom we follow. The recipe from Kitschy Cupcakes: Unroll crescent rolls and close up the seams, use a pizza cutter to slice the crescent dough into smaller rectangles, and put a scoop of Nutella in each one -- I recommend a good-sized scoop, as our filling didn't melt and spread as much as we expected. Fold the dough over the Nutella and crimp the edges with the tines of a fork.  Toss the pocket in cinnamon and sugar and then bake according to the package directions.

2.  Nutella S'mores

This is easy and you will quickly become addicted to the sugary goodness. Slather your nutella on a graham cracker. Add mini marshmallows, then spread Nutella on the "top" cracker as well (this is optional but I highly recommend it). Microwave for 9 seconds (depends on your microwave strength but this was enough to melt them, but not enough to dry them out). Kids will love this since the marshmallows expand in the microwave. I warn you, have plenty of grahams and marshmallows on hand!


3.  Just Nutella

Eat it with a spoon (or your fingers)! Sometimes keeping it simple is the way to go. Nutella can be the perfect solution to that chocolate craving...just watch out: In my house it never lasts long once found!

June 13, 2012

More Baby Bibs

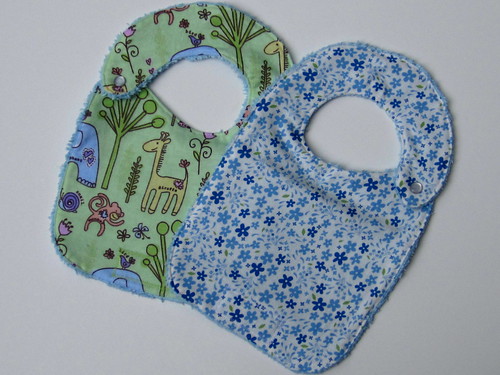
Flannel & chenille bibs

It all started when my sister made some baby bibs and posted a how-to here -- she made them look so easy that I finally decided to give them a try.  I had plenty of flannel on hand for my burp cloths, so I picked up some light blue chenille and a pack of pearl snaps and got to work.  Jen wasn't lying -- these bibs are really simple to make.

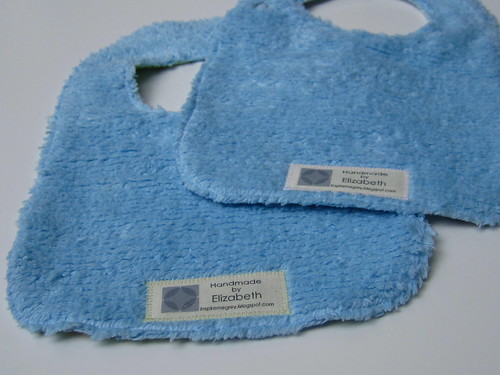
Flannel & chenille bibs

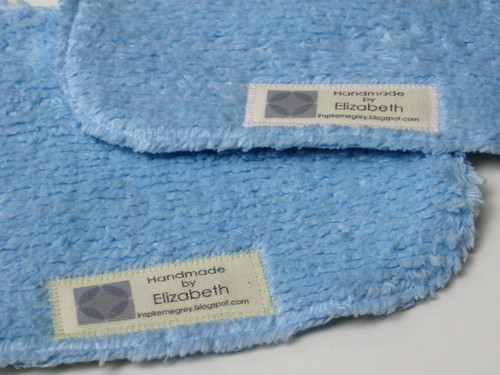
I added my labels to the chenille side with a zigzag stitch guaranteed to hold up to lots of messes and subsequent washes. These bibs went to two of my friends, to be worn by their sweet daughters.

Labels on bibs

June 6, 2012

Applique Onesies: New Sets for Girl and Boy


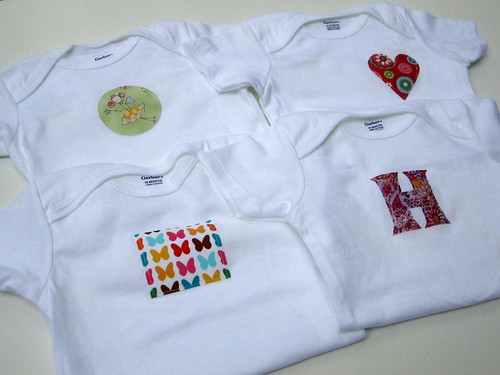
Cute kid alert! Applique onesies are relatively quick and painless to make, not to mention inexpensive. I love seeing kiddos wearing the ones I've made, so I guess I'll continue making them -- twist my arm. My other posts about this project are here and here.


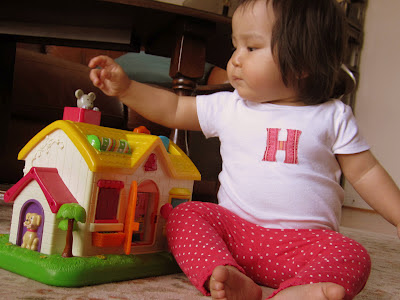
My niece Hannah is growing out of the 12-month size set that I made for her earlier this year, so I put together a new set in the next size up. Jen wanted another "H," and I pulled some of my favorite girly fabrics for the rest.

Applique onesies

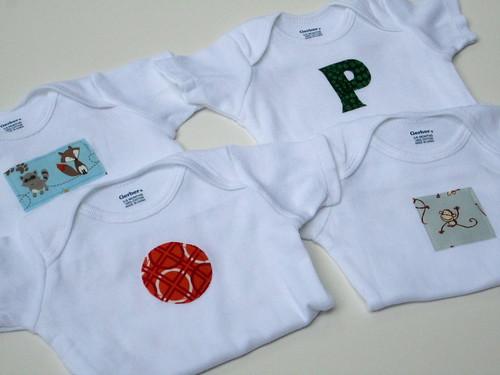
This other set is for a new baby named Parker.  The raccoon and fox appeared on a scrap left over from another quilt (which will have a Big Finish reveal on the blog here sometime soon -- hopefully!), and the monkey is another piece left over from a baby quilt from last year. I have lots and lots of the monkey fabric left, so I'm always looking for ways to use it.

Applique onesies

June 3, 2012

Stars: 12 Months of Ornaments {June Theme}

This month's theme for the ornament challenge is ***stars***.  Although the shape doesn't vary much, I think there's a lot of opportunity for embellishment this month.  Embroidery, beads, mixing colors -- there are lots of ways to jazz up our star ornaments.  Keep an eye on the blog this month to see what we create!

photo by The Purl Bee
These stars are from the Purl Bee -- you can find the tutorial here: http://www.purlbee.com/mollys-star-ornaments/.

LinkWithin

Related Posts Plugin for WordPress, Blogger...